The Ultimate Guide to Garage Lighting Ideas (2026): Design, Layout, and Setup
💡 1. What Makes a Great Garage Lighting Setup?
A great garage lighting setup isn’t just about brightness—it’s about control and consistency.
Most garages fail because they rely on:
- one central light source
- uneven fixture placement
- low-output lighting
This creates shadow zones and visual inconsistency.

🔑 The 3 Things Every Setup Needs
1. Even Light Distribution
Light should cover the entire garage—not just the center.
2. Minimal Shadows
Shadows make your garage feel smaller and less refined.
3. Consistent Brightness
No harsh bright spots or dim corners.
Expert Insight:
Your goal isn’t to “light the garage”—it’s to eliminate contrast across the entire space.
🧱 2. Garage Lighting Layout (Where Most People Go Wrong)
If there’s one place people mess up—it’s layout.
You can have great lights, but if they’re poorly arranged, the result will still feel off.
🔲 Structured Layout vs Random Placement
A structured layout:
- creates symmetry
- improves visual flow
- eliminates dead zones
Random placement:
- causes uneven lighting
- creates visual imbalance
📐 How to Think About Layout
Instead of:
“Where can I fit lights?”
Think:
“How do I evenly cover the entire ceiling?”
Best Practices:
- space lights evenly
- align them in clean patterns
- avoid clustering in one area
Pro tip:
Stand in your garage and look for shadow zones—those are layout failures, not brightness issues.
And thinking about a garage makeover? This guide will walk you through options.

💡 3. Choosing the Best Garage Lighting Type
Not all lighting works well in a garage environment.
The key is choosing lighting that provides:
- wide coverage
- consistent brightness
- clean visual output
🔍 What to Look For in Garage LED Lighting
1. High Lumen Output
More lumens = better coverage.
2. Wide Beam Spread
Prevents spotlighting and uneven light.
3. Clean Light Color
Cool white lighting enhances clarity and detail.
Important:
Wattage doesn’t equal brightness—lumens do.

🎨 4. Color Temperature (Why Your Garage Might Look Dull)
Color temperature has a massive impact on how your garage feels.
Warm vs Cool Lighting
Warm Light (Yellow Tones)
- feels dimmer
- looks outdated
- reduces clarity
Cool White Light
- looks brighter
- feels cleaner
- enhances reflections
Recommended Range:
👉 5000K–6500K
Pro tip:
If your garage doesn’t feel “crisp,” your lighting color is likely too warm.

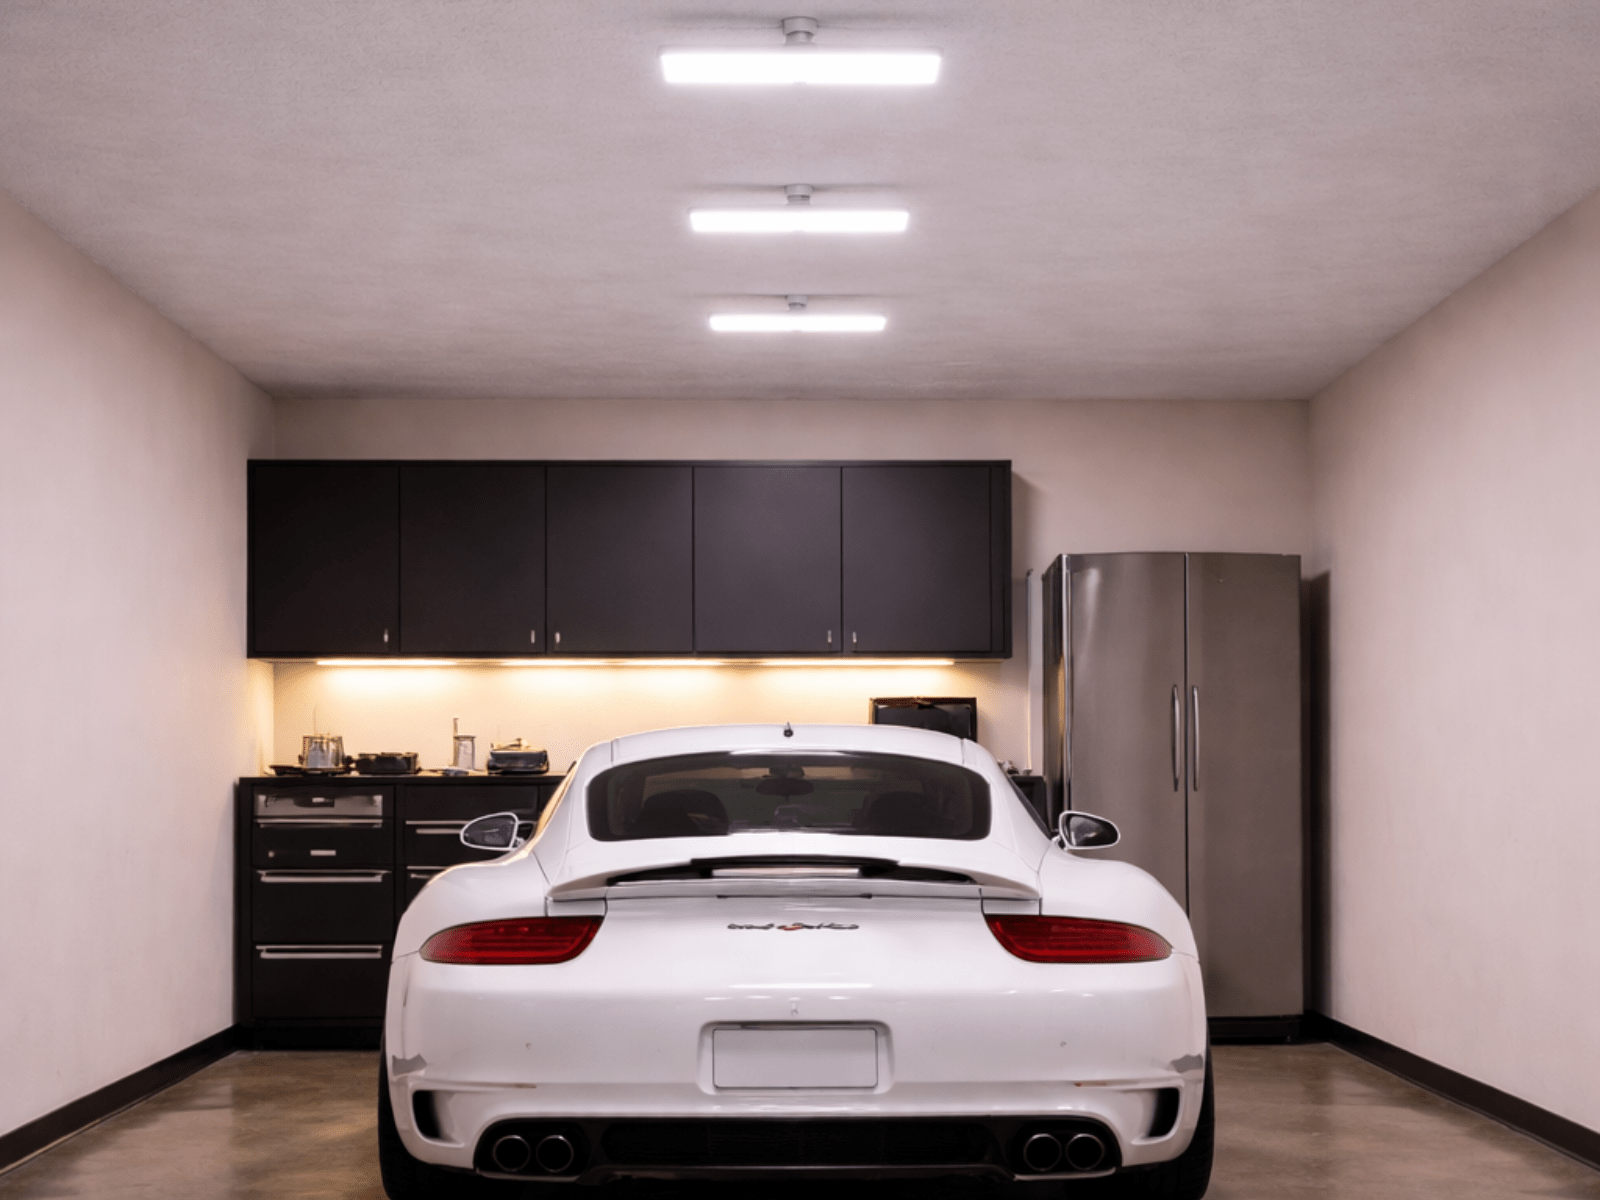
🧠 5. Layered Lighting (The Secret to a High-End Look)
Most garages rely on a single lighting layer—overhead.
That’s why they feel flat.
What Is Layered Lighting?
Using multiple light sources at different levels:
- ceiling lighting (main coverage)
- lower or directional lighting (depth and focus)
Why It Works:
- adds dimension
- creates contrast
- makes the space feel designed
Expert Insight:
Flat lighting makes your garage look like storage. Layered lighting makes it feel like a showroom. As in the image below, the upper “main” lighting lights the room, but the side lighting “accents” the room.

If you’re looking for amazing lighting options for your garage and looking to take your garage to the next level, check out the Lit Garages lighting packages here.
🚗 6. Lighting for Visual Impact (Making Your Garage Stand Out)
Lighting isn’t just functional—it’s visual.
A well-lit garage draws attention to what matters.
Highlight Zones
Use lighting to emphasize:
- your car
- workbench areas
- feature walls
Why This Matters:
If everything is equally lit, nothing stands out.
Pro tip:
Create contrast—not everything should have the same intensity.

🪞 7. How Surfaces Affect Lighting
Lighting doesn’t work alone—it interacts with your environment.
Reflective vs Absorbing Surfaces
Reflective Surfaces:
- amplify light
- make the space feel brighter
- increase depth
Absorbing Surfaces:
- dull lighting
- reduce visibility
- make the space feel smaller
What Helps Most:
- clean floors
- smooth wall finishes
- uncluttered surfaces
Pro tip:
If your lighting feels weak, your surfaces may be working against it.
🧰 8. Common Garage Lighting Mistakes (Avoid These)
❌ Uneven Layout
Leads to shadows and imbalance
❌ Not Enough Coverage
Creates dim zones
❌ Wrong Color Temperature
Makes the garage feel outdated
❌ Treating Lighting as an Afterthought
Instead of a foundation
Expert Insight:
Most lighting problems aren’t caused by bad products—they’re caused by poor planning.
Take a look at these common garage design mistakes and how to avoid them.

🧱 9. Designing Your Garage Around Lighting
Here’s where most people get it backwards.
They:
- build the garage
- then add lighting
The better approach:
Design your garage with lighting as the foundation.
Why This Works:
- everything aligns visually
- no retrofitting issues
- better overall result
🔥 10. What a Complete Garage Lighting Setup Looks Like
A complete setup includes:
- full ceiling coverage
- consistent brightness
- clean layout
- minimal shadows
- intentional design
When all of these come together, your garage:
- looks bigger
- feels cleaner
- stands out immediately
Check out the checklist we created for making an amazing garage

🧠 Final Thoughts: Why Lighting Is the First Upgrade You Should Make
Every major garage transformation starts with lighting.
Because once lighting is right:
- everything else looks better
- upgrades feel more impactful
- the space feels complete